
Laying Porcelain Slabs on Sand vs Concrete: The Ultimate Installation Guide
Porcelain has fast become one of the most popular choices for garden patios across the UK. It looks great, lasts for years, and needs very little upkeep. However, fitting porcelain requires a different approach compared to traditional concrete flags or natural sandstone.
A question we get asked all the time at Beatson’s is what should go underneath the slabs? Can you get away with laying porcelain slabs on sharp sand, or do you need a wet mortar bed over a solid sub-base?
This guide compares your sub-base options, lays out the ideal mortar mix, and walks through the step-by-step fitting process so your paving stays solid for years to come.
TL;DR
- Skip Sand Beds: Porcelain requires a 30mm to 50mm wet mortar bed over a compacted MOT Type 1 sub-base.
- Always Prime: Apply a primer to the reverse side of every slab immediately before laying.
- Use Sharp Sand: Stick to a 4:1 sharp sand-to-cement ratio for the mortar mix.
- Full Mortar Bed: Lay on a full bed with no air gaps to prevent frost cracking.
- Use Continuous Diamond Blades: Cut slabs using wet saws or continuous rim blades to prevent edge chips.
Content
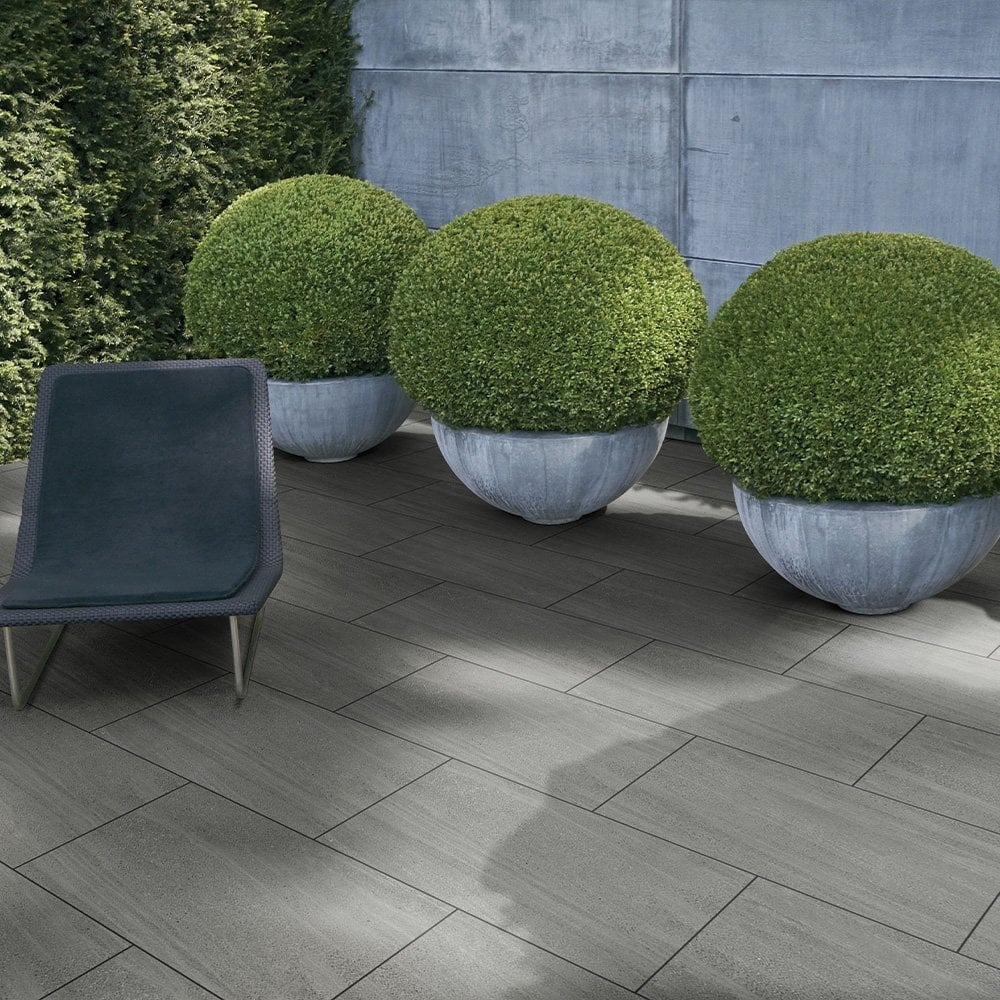
What is the Best Base to Lay Porcelain Slabs On?
The best base for laying porcelain slabs is a compacted 100mm MOT Type 1 sub-base covered by a full 30mm to 50mm wet mortar bed mixed at a 4:1 sharp sand to cement ratio. Because porcelain absorbs virtually no water, you must also brush a polymer primer onto the back of every slab to create a secure bond with the mortar.
Why Sand Alone Fails for Porcelain
Traditional concrete flags and sandstone are porous. They absorb moisture from below and settle naturally into the mortar bedding. Porcelain slabs are vitrified, meaning they are baked at high temperatures (kilning) to become non-porous (absorbing less than 0.5% water).
If you attempt laying porcelain paving slabs directly onto loose or dry sand, several issues will quickly appear:
- No Adhesion: Sand provides no chemical or mechanical bond to non-porous porcelain. Slabs will shift and rock underfoot almost immediately.
- Frost Heave: Water gets trapped between the slab and the sand beneath. When winter frosts arrive, expanding ice pushes the slabs upward, causing cracking and uneven surfaces.
- Washout: Rainwater washes loose sand away from underneath the edges, creating hollow voids beneath your patio.
Even if you are looking for a beginner’s guide to laying a DIY porcelain slab path on a budget, skipping the wet mortar bed and primer will lead to loose tiles that need relaying after a single winter.
Sand Bed vs Mortar & Concrete: The Comparison
Choosing the right base foundation depends on ground conditions and expected foot traffic.
| Sub-Base Method | Suitable for Porcelain? | Key Features | Risk Level |
| Sand Bed Only | No | Cheap and fast to lay, but offers zero bond to non-porous tile. | High (Slabs rock, risk of frost heave) |
| Full Mortar Bed + Sub-Base | Yes (Gold Standard) | 100mm compacted MOT Type 1 topped with a 30mm–50mm wet mortar bed and primer. | Low (Solid, durable, frost-proof) |
| Existing Concrete Base | Yes | A solid concrete pad with a mortar bed and primer laid on top. | Low (Ideal for high weight or driveway areas) |
Can You Lay Porcelain Slabs Directly Over an Existing Concrete Driveway?
Yes, provided the concrete driveway is structurally sound, clean, free from major cracks, and built with a slope for water runoff. Slabs should not be glued straight onto raw concrete with thin-bed adhesive outdoors. Instead, lay a 30mm wet mortar bed over the concrete base, coat the reverse side of each tile with SBR primer, and bed them into place as normal.
How Do You Install Outdoor Porcelain Patio Tiles Step-by-Step?
To install outdoor porcelain patio tiles step-by-step: excavate the area to 150mm–200mm, lay and compact 100mm of MOT Type 1, mix a 4:1 sharp sand to cement mortar bed, brush primer onto the back of each slab, press into the wet mortar bed, level with a rubber mallet, leave 3mm–5mm joint gaps, and allow 24 to 48 hours before grouting.
Step 1: Ground Excavation
Dig out the site to a depth of roughly 150mm to 200mm. This leaves enough room for 100mm of sub-base, a 30mm to 50mm mortar bed, and the slab thickness (usually 20mm for exterior porcelain). Ensure a fall of 1:60 (a 17mm drop per metre) away from any walls or buildings to handle rainwater drainage.
Step 2: Laying the Sub-Base
Spread MOT Type 1 aggregate across the excavated area. Compact it thoroughly using a vibrating plate compactor (wacker plate) in layers until you have a dense, level 100mm foundation.
Step 3: Mixing the Mortar Bed
The best mix for laying porcelain slabs is a ratio of 4 parts washed sharp sand to 1 part cement. Mix with clean water to a workable, wet-damp consistency that holds its shape when squeezed. Avoid soft building sand, as it lacks structural strength and degrades over time under heavy paving.
Step 4: Applying Primer
Because vitrified porcelain does not absorb water, standard mortar will not stick to it on its own. Coat the underside of every slab with a polymer primer (or an SBR cement slurry mix) using a brush right before placing it down. This acts as the bonding agent between tile and mortar.
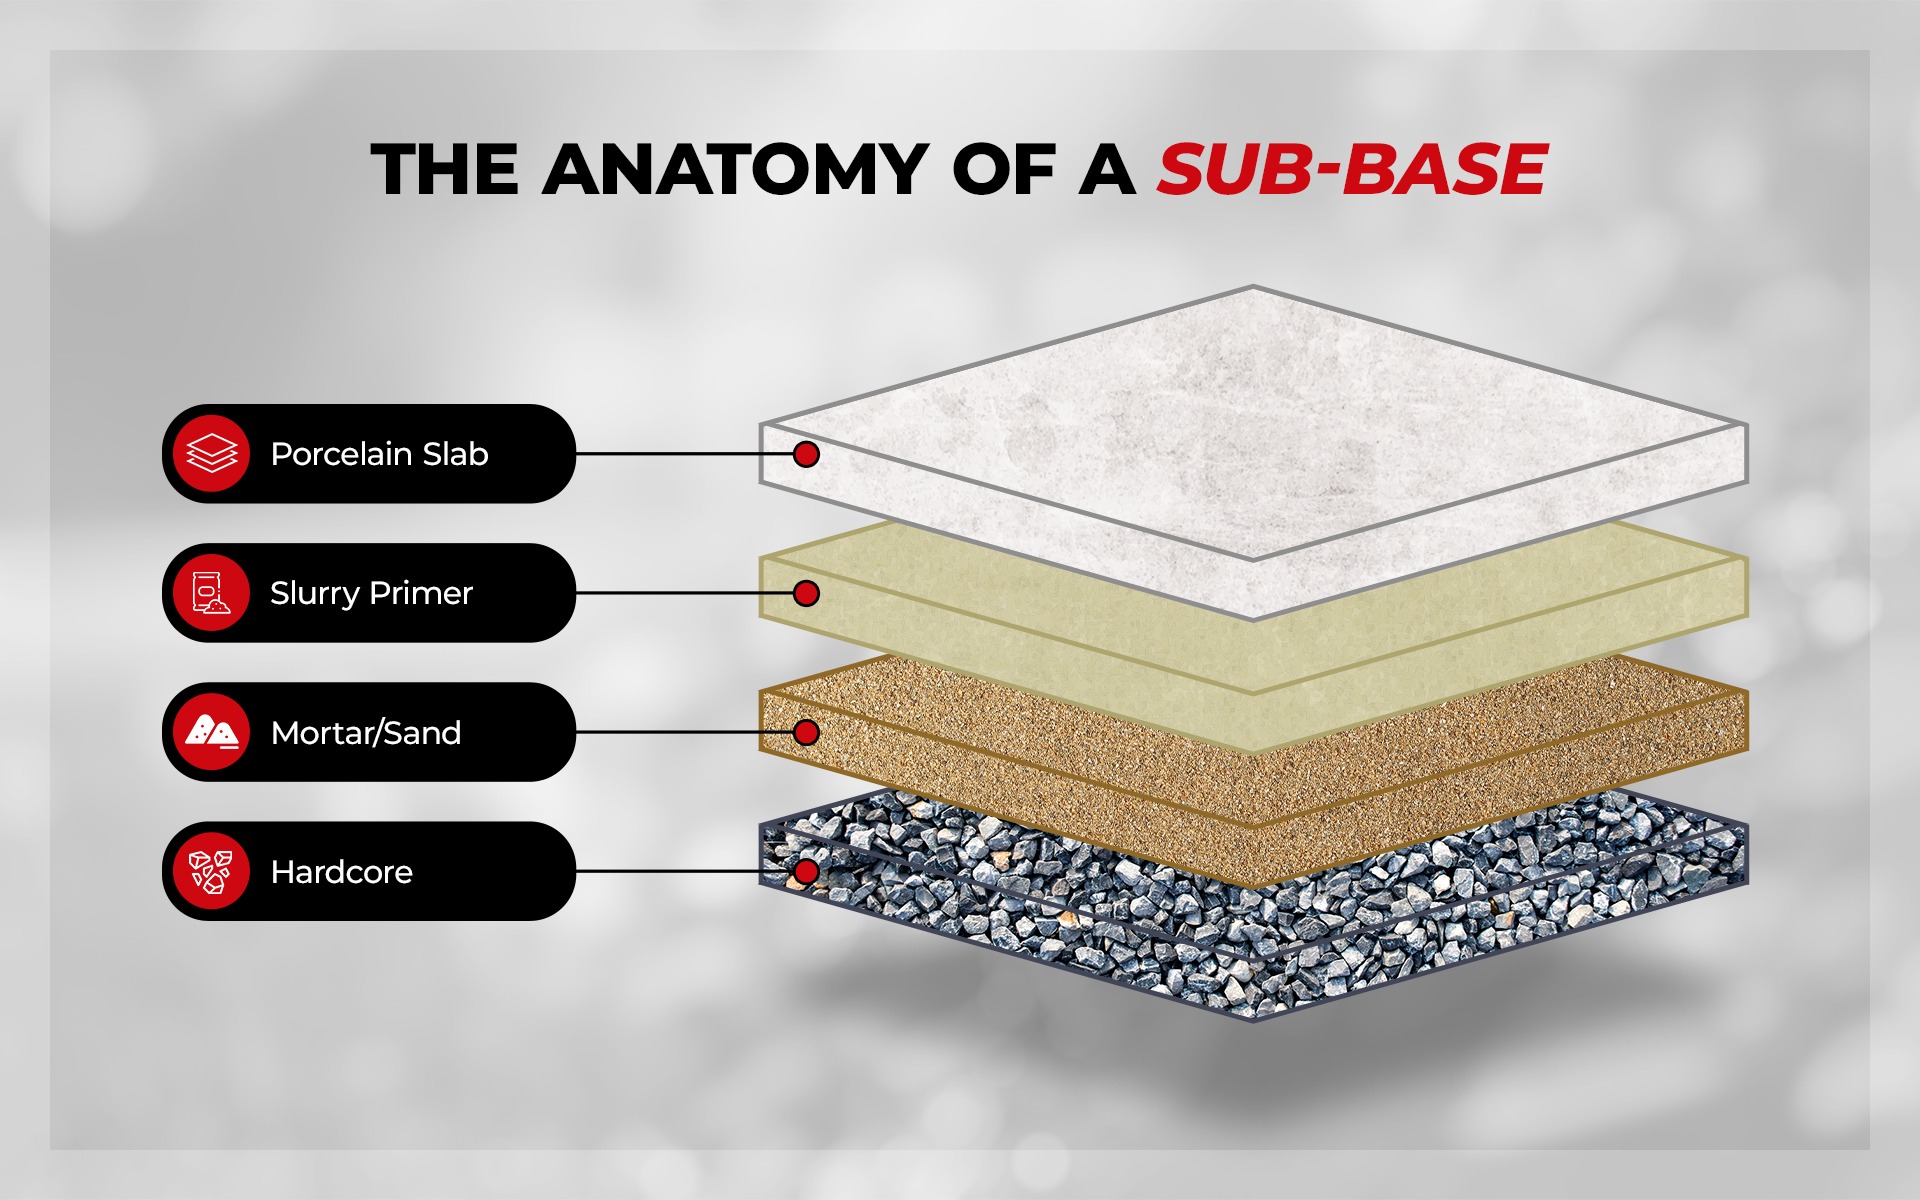
Patio Layer Structure:
- Top: 20mm Porcelain Slab
- Bonding Layer: Polymer / SBR Primer
- Bedding Layer: 30mm to 50mm Wet Mortar Bed (4:1 sharp sand to cement)
- Foundation: 100mm Compacted MOT Type 1 Aggregate
- Base Ground: Geotextile Membrane & Soil
Step 5: Laying and Levelling
Lower the primed slab onto the wet mortar bed. Never use spot bedding (dot and dab), where mortar is only placed under the corners. Spot bedding leaves air gaps where water collects, causing frost damage and creating hollow spots that break under weight. Tap the tile down into the bed using a rubber mallet and check levels with a spirit level.
Step 6: Cutting Slabs Cleanly
What are the most effective tools for cutting porcelain slabs without chipping?
Because porcelain is extremely hard, standard slab splitters will crack the tile. Use an angle grinder or a wet bench saw fitted with a continuous rim diamond blade specifically rated for hard porcelain. Wet cutting keeps the blade cool, reduces dust, and prevents edge chipping.
Step 7: Grouting the Joints
Maintain a minimum joint space of 3mm to 5mm between tiles to allow for slight ground movement and expansion. Once the mortar bed cures, sweep an exterior jointing compound or brush-in grout into the gaps and compact it thoroughly.
Practical Tips: Tools, Weather, and Maintenance
Essential Tools for Laying Porcelain Paving Slabs
- Vibrating plate compactor (wacker plate)
- Cement mixer or mixing paddle
- Masonry brush for primer
- Rubber mallet and long spirit level
- Continuous rim diamond blade wet saw or angle grinder
- Tile spacers (3mm to 5mm)
- Bucket, sponge, and stiff brush for cleanup
How to Handle Porcelain Slab Installation in Freezing or Wet Weather Conditions
Avoid laying paving when temperatures fall below 5°C or during heavy rainfall. Rain dilutes the mortar bed and washes away the primer before it can set. Freezing conditions stop cement from setting properly and cause water trapped in uncured mortar to expand. If rain starts during installation, protect fresh work with waterproof sheeting.
How Long After Laying Porcelain Slabs Can You Walk On It?
Leave the mortar bed to cure for at least 24 to 48 hours before walking on fresh paving. Avoid placing heavy garden furniture, planters, or equipment on the surface for a minimum of 72 hours.
Do Porcelain Slabs Get Slippery When Wet?
High-quality exterior porcelain slabs are made with a subtle textured surface, typically carrying an R11 slip rating. This texture gives good grip underfoot, even in wet weather.
How to Clean and Maintain Outdoor Porcelain Slabs to Prevent Algae Growth
Is porcelain paving hard to keep clean? Porcelain is non-porous, meaning algae, lichen, and dirt stay on the surface rather than soaking into the material.
To keep your patio looking good:
- Sweep away leaves and garden debris regularly to stop organic staining.
- Wash the surface with warm soapy water and a stiff bristle brush every few months.
- For general grime, use a dedicated porcelain cleaner or a light pressure washer setting.
Frequently Asked Questions (FAQs)
What are the common mistakes when laying slabs?
The most frequent errors include using spot bedding (dot and dab) instead of a full mortar bed, skipping the polymer primer, laying tiles directly on loose sand, using soft building sand instead of sharp sand, and forgetting to build in a drainage slope.
Can you lay porcelain slabs using a dry sand and cement mix?
A dry mix is not suitable for porcelain paving. Dry mortar lacks the moisture required to activate the slurry primer, leaving the tiles resting loosely on top of the base rather than sticking to it.
Porcelain Paving at Beatsons
Getting a porcelain patio right comes down to proper ground prep and using the correct materials from the start. By sticking to a well-compacted MOT Type 1 foundation, a full 4:1 wet mortar bed, and a solid coating of primer, you can be confident your slabs will stay firmly bonded and stand up to frost and heavy rain year after year.
When you are ready to get your project underway, Beatson’s has everything you need to do the job properly. Shop our range of porcelain paving, sub-base aggregates, mortar, and primers online, or pop into your local Beatson’s branch. If you need a hand calculating materials or choosing the right products, just give your nearest branch a call; our friendly team is always happy to help.
Read Next
The Ultimate Aggregates Project Guide: Measurement, Calculation, and Best Practices
Porcelain vs Sandstone Paving: Which is Best for Your Patio?
How to Build a Garden Wall in 7 Easy Steps
Comments are closed here.