
How To Install a Garden Gate: 10 Easy Steps To Success
| TL;DR: The Trick for Hanging a Gate Instead of struggling to level a heavy gate between fixed posts, our guide recommends a simple trick: build it on the ground first. Here is the quick version of how to get it right: Assemble flat: Lay your gate and posts on the ground to ensure proper spacing, then attach your hinges and latches comfortably. Brace it: Screw spare timber across the whole assembly to lock the posts in position so they can’t move. Drop it in: Dig your holes and lower the entire unit (gate and posts) into the ground as one solid piece. Concrete and set: Check your levels, pour your Postcrete, and once it’s solid, remove the braces. |
Hanging a garden gate can be fiddly. However, there is a method that makes the job much easier: assemble it on the ground first.
By attaching the posts to the gate before you dig the holes, you guarantee the spacing is perfect. You then lower the entire assembly into the ground as a single unit. Here is the Beatson’s guide to getting it right.
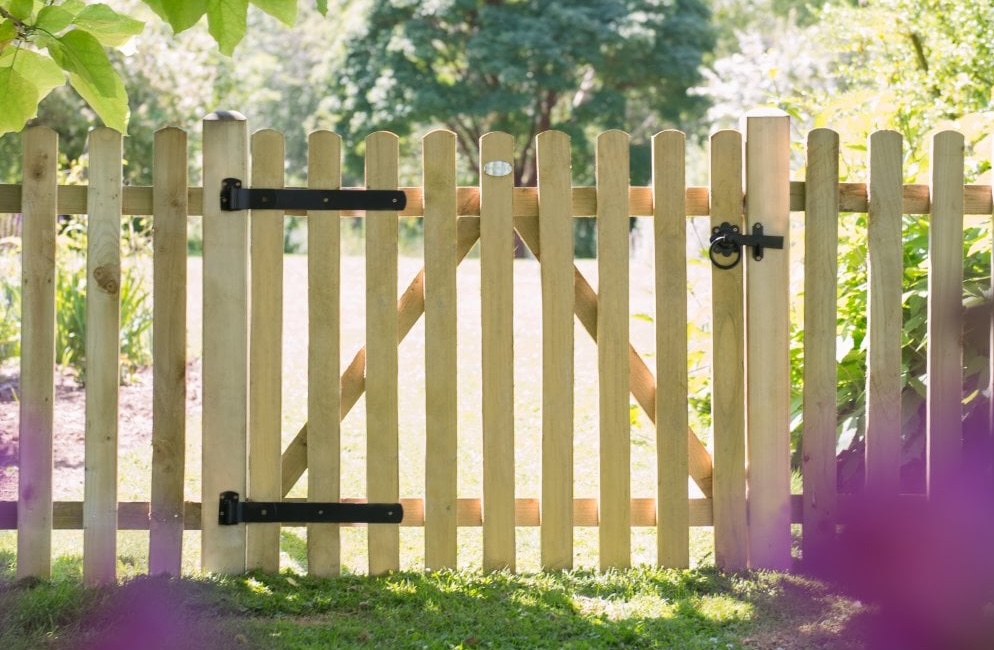
Before you start: Measuring up
Most mistakes happen before the spade even hits the ground. Even if you are replacing an existing gate, don’t just measure the old gate and buy the same size. Timber expands and contracts, and your old gate might have been ill-fitted to begin with.
Measure the opening (the gap between the posts). You need to allow for three things:
- The width of the gate.
- Clearance for the hinges and latch.
- Expansion gaps. (We recommend leaving a 5mm gap on either side of the gate to stop it jamming in winter).
Tools and Materials
Make sure you have everything to hand before you mix your concrete.
| Materials | Tools: |
|---|---|
| Wooden Gate: Browse our range of fencing and gates here. Timber Posts: Ideally 100mm x 100mm for stability. Postcrete / Concrete Mix. Hinges, latch, and screws. Shop Gate Fittings here. Wood Preservative. | Spade or post-hole digger. Spirit level (essential). Drill/Driver and drill bits. Saw. Tape measure and pencil. |
Step 1: Weather the Posts
If your gate posts are flat on top, rainwater will sit there and eventually cause the wood to rot. You need to create a slope (weathering) for the water to run off.
Using a sliding bevel, mark a 20-degree angle at the top of each post.
Step 2: Cut and Treat The Wood
Continue your line square down the face of the post and saw neatly along it.
Once cut, apply a generous coat of wood preservative to the raw timber.
If your posts are untreated softwood, you should treat them all over before starting.
Step 3: Lay Out the Assembly
Decide which way you want the gate to open. Lay the gate face down on a flat surface and place your posts on either side.
- Orientation: Look at the diagonal brace on the back of the gate. It must point downwards towards the side where the bottom hinge will go. This feature transfers the weight to the post. If it points upwards, the gate will sag.
- Height: Position the posts so their tops are approx 50mm higher than the top of the gate.
- Spacing: Use timber off-cuts or wedges to create a 5mm gap between the gate and the post on both sides.
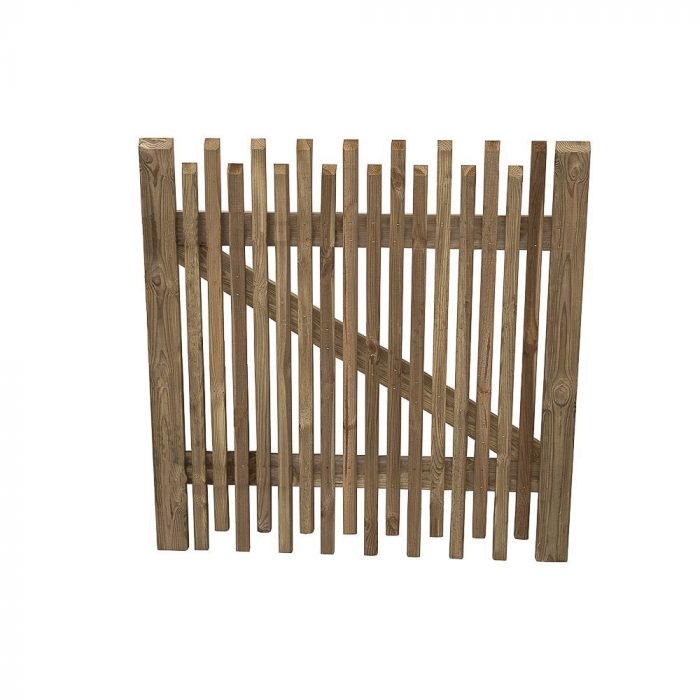
Recommended Product: Forest
Contemporary Picket Gate 3ft
Complete your run of modern picket fencing with the Forest Contemporary 3ft Picket Gate.
This gate is a stylish, modern alternative to a traditional low-level gate, ideal for front gardens. Its distinctive design features staggered timber battens to create a striking, contemporary look.
Step 4: Position the Hinges
Place your T-hinges in position on the back of the gate. The long strap should be placed across the gate’s horizontal brace for maximum strength.
Mark the screw positions with a pencil. Drill one pilot hole first. Test it by driving in a screw. If the drill bit is too large, the screw won’t grip; if it’s too small, you risk splitting the wood. Once you’re happy, drill the rest.
Step 5: Fix the Hinges to the Posts
Screw the hinges firmly in place using galvanised screws (which won’t rust).
Tip: If you are finding it tricky to line the hinges up perfectly on the post, you can choose to fit the hinges to the gate now, but wait to screw them to the post until the very end. However, doing it now usually ensures a tighter fit.
Step 6: Fit the Latch
It is much easier to fit a latch when the gate is lying flat on the ground than when it’s swinging vertically. Drill your pilot holes and screw the latch into place. Remember to check the 5mm gap between the gate and the post again and ensure the latch bar reaches across comfortably.
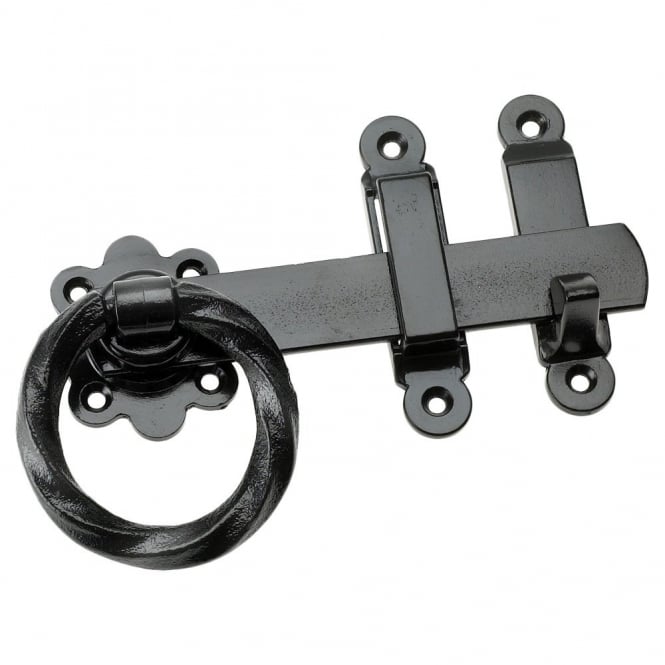
Recommended Product: Eliza Tinsley
6-inch Black Twisted Ring Gate Latches
Finish off your gate installation with this 6-Inch Black Twisted Ring Gate Latch. Combining a traditional aesthetic with everyday durability, this latch features a decorative twisted handle and a weather-resistant black finish. It is durable, easy to operate, and suitable for use on timber, vinyl, or metal gates. A practical and stylish way to keep your property secure.
Step 7: Brace the Gate Assembly
This step is the key to this method. You need to combine the separate parts (gate and posts) into a single solid unit.
Screw three lengths of spare timber (battens) horizontally and diagonally across the gate and posts. This “locks” the posts in the perfect position with the correct gaps, ready for lifting.
Step 8: Digging the Holes
Check for cables and pipes before you dig. Use the braced gate assembly to mark exactly where your holes need to be. Move the gate aside and start digging.
- Depth: As a rule of thumb, you want at least 600mm (2ft) of the post underground for a standard gate.
- Drainage: Put a layer of gravel or hardcore at the bottom of the hole. Doing this allows water to drain away so the post isn’t sitting in a puddle.
Tip: If the ground is soft, dig a trench between the two post holes (about 300mm wide and 200mm deep) and fill it with concrete later. Doing this creates a solid bar of concrete underground that stops the posts from being pulled inwards by the weight of the gate.
Step 9: Install and Concrete
Lower your gate assembly (posts and all) into the holes.
- Check Level: Use a spirit level to check that the posts are upright and the gate is level.
- Props: Use timber props to hold the assembly in position so it doesn’t move.
- Pour: Pour your postcrete or concrete mix around the post. Follow the instructions on the bag.
- Haunching: Slope the surface of the wet concrete downwards away from the post to shed rainwater.
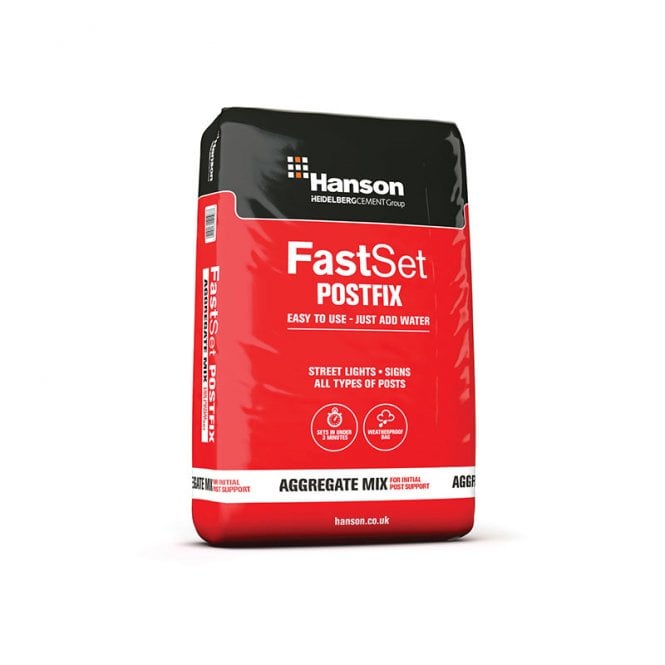
Recommended Product: Hanson Fast Set Postcrete 20Kg
Hanson Fast Set Postfix is the simple, fast-setting concrete solution you need for securely fixing posts into the ground.
This product is incredibly easy to use, just add water! The mixture sets in under 3 minutes, making it ideal for those jobs where speed and efficiency are essential.
Step 10: The Big Reveal
Patience is key here. If using concrete instead of postcrete, let it set for 48 hours. Once it is rock solid, you can unscrew the timber braces and props. Because you set the spacing on the ground, your gate should swing perfectly with the correct expansion gaps and ground clearance.

Common Mistakes to Avoid
- Not digging deep enough: Shallow holes lead to wobbly posts.
- Ignoring the pilot holes: Splitting the timber weakens the screw’s hold.
- Forgetting the expansion gap: If the gate fits “snug” in summer, it will jam shut in winter when the wood absorbs moisture and swells.
Adjusting a Newly Installed Gate
Sometimes, despite your best efforts, a gate might drop slightly after hanging. If the gate catches on the bottom corner:
- Check that the hinge screws are tight.
- You may need to unscrew the bottom hinge slightly and pack it out with a thin sliver of wood or cardboard behind the hinge plate to lift the bottom corner of the gate.
Shop Beatson’s for your supplies
Need supplies for the job? Whether you need a heavy-duty latch, a bag of Postcrete, or the gate itself, Beatson’s has you covered. Browse our full range of Fencing and Gates online, or pop into your local branch.
Comments are closed here.