
How to Fit Acoustic Wall Panels: A Complete Installation Guide
Unwanted noise can quickly disrupt the peace in your home. If you are struggling with sound travelling between rooms or echoing in open areas, acoustic panelling is a highly practical and stylish solution. In this guide, we will walk you through exactly how to confidently fit acoustic wall panels. From choosing the right finish to navigating tricky corners, you will find all the instructions you need for a professional-looking result.
TL;DR
- Acoustic panels reduce noise transfer and immediately improve room sound quality.
- You can install panels using either strong adhesive or screws.
- Essential tools include a fine-tooth saw, measuring tape, and a spirit level.
- Planning your layout first is crucial for navigating corners and plug sockets seamlessly.
Content
- What Are Acoustic Wall Panels?
- Why You Need Sound Insulation
- Quick Guide to Choosing Panels
- Introducing the Tuda Artificial Living Grass Walls Range at Beatson’s
- Toolkit for Installation
- A Simple Installation Guide: How to Fit Acoustic Wall Panels
- How to Cut and Modify Acoustic Wall Panels
- Frequently Asked Questions (FAQs)
- Acoustic Wall Panels at Beatson’s
What Are Acoustic Wall Panels?
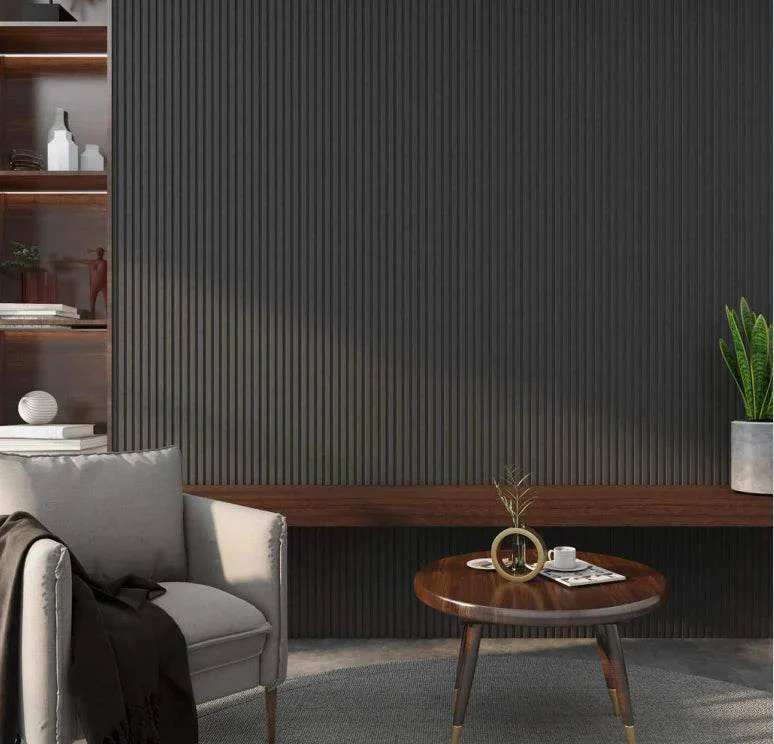
Acoustic wall panels are sound-absorbing boards designed to reduce noise, echo, and reverberation within a room. Typically made with a sound-dampening felt backing and decorative timber slats, they provide both acoustic insulation and a modern aesthetic finish for interior walls.
These panels intercept sound waves, preventing them from bouncing off hard surfaces. They are highly effective for managing acoustics in living rooms, home offices, and bedrooms without major structural renovations.
Why You Need Sound Insulation
Installing sound insulation improves the acoustic quality of your room while reducing noise transfer from neighbours or other areas of the house. It creates a quieter environment, enhancing productivity in home offices and creating a more relaxing atmosphere in living spaces.
Modern homes often feature hard flooring and minimalist designs that allow sound to bounce easily. Adding acoustic panelling absorbs these echoes. This means clearer audio when watching television, fewer distractions when working, and a more peaceful environment overall.
Quick Guide to Choosing Panels
Choosing the right acoustic panels depends on your specific noise problem and design preferences. Consider the acoustic felt’s thickness for sound absorption, the materials’ durability, and how the wood finish complements your existing interior styling.
- Assess your noise levels: Thicker felt backings offer superior sound absorption for loud or echo-prone environments.
- Select your finish: Match the wood veneer to your current furniture and flooring. Oak and walnut are popular choices for a warm, natural look.
- Measure your space: Calculate the wall area to determine exactly how many panels you need. Always order a little extra to account for cuts and adjustments.
Introducing the Tuda Artificial Living Grass Walls Range at Beatson’s
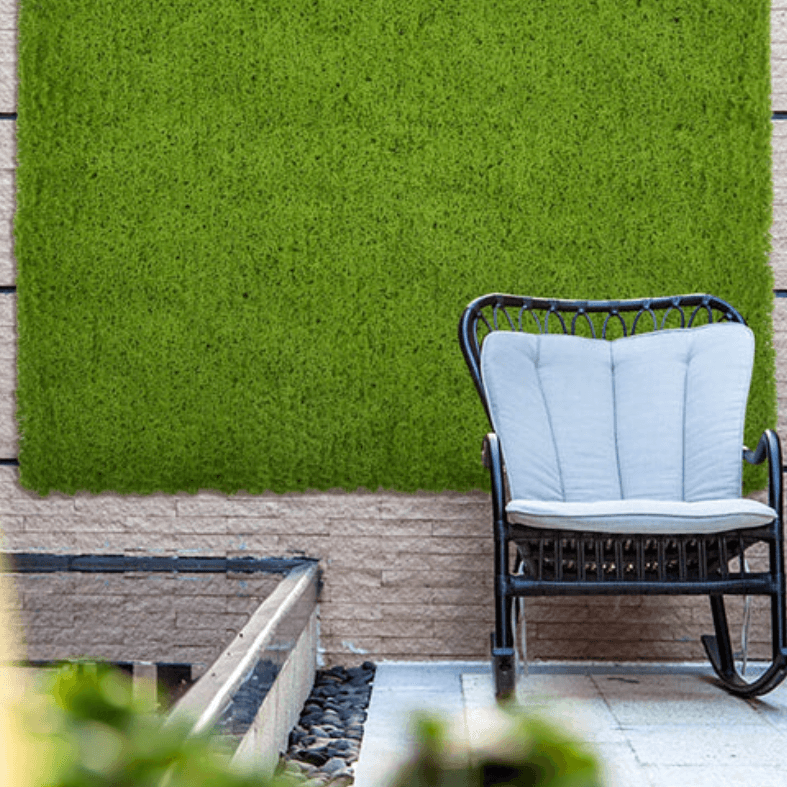
The Tuda Artificial Living Grass Walls range is all about adding a fresh, vibrant look to your garden walls, fences or even your interior! Designed primarily for aesthetic appeal, yet with some sound-absorbing qualities due to their textured 3D finish, these high-quality greenery panels offer a lush, evergreen backdrop without the maintenance of real climbing plants. They are ideal for creating an eye-catching feature wall on a patio, softening a stark brick border, or brightening up a backyard seating area (mention indoor settings here). Because they are designed with the practical DIYer in mind, they are quick and straightforward to fit.
Bringing the Panelling Trend Indoors
Tuda Grass wall panels aren’t just for garden walls; they look just as good indoors, creating a striking feature wall or adding a splash of greenery to an interior room.
If you prefer a natural timber look, Tuda also makes brilliant acoustic wall panels available in a range of classic wood finishes; they combine clean, modern style with practical sound insulation to reduce noise and keep rooms quiet. Simple to fit and built to last, explore the full Tuda collection at Beatson’s to find the right finish for your next project.
Toolkit for Installation
Before installing acoustic wall panels, gather all necessary tools to ensure a smooth workflow. You will need a tape measure, a spirit level, a fine-tooth saw, appropriate fixings (screws or adhesive), and a pencil for marking your cuts.
The Essentials:
- Tape measure & spirit level
- Pencil
- Fine-tooth hand saw or circular saw (for cutting panels)
- Utility knife (for cutting the felt backing)
- High-quality adhesive or wood screws (depending on your chosen method)
- Screwdriver or drill
- Sandpaper (for smoothing cut edges)
A Simple Installation Guide: How to Fit Acoustic Wall Panels
You can fit acoustic wall panels using two main methods: applying a strong adhesive directly to the wall or screwing the panels into timber battens. Both methods require careful measurement and a level starting point to ensure a straight and secure finish.
While it might seem intimidating at first, attaching acoustic panels to wall surfaces is a highly manageable job for any handy homeowner. Follow these steps.
Method 1: Installing with Grab Adhesive
- Prepare the wall: Ensure your wall surface is clean, dry, and free of dust or loose wallpaper.
- Measure and mark: Use your tape measure and spirit level to mark a straight vertical line where your first panel will sit.
- Apply adhesive: Apply a generous amount of grab adhesive to the back of the acoustic felt. Use a continuous zigzag pattern for even coverage.
- Position the panel: Press it firmly against the wall and align it carefully with your level line. Hold it in place for a few moments to allow the adhesive to grip.
- Repeat: Slot the next panel alongside the first, ensuring the edges meet tightly, and repeat the process across the room.
Method 2: Installing with Screws and Battens
- Attach battens: Fix timber battens horizontally across your wall, spacing them roughly 400 mm to 600 mm apart.
- Position the panel: Place your first panel against the battens and check it carefully with a spirit level.
- Insert screws: Make a pilot hole, then drive screws directly through the acoustic felt backing and into the timber battens. Use black screws to help them blend seamlessly into the dark felt.
- Continue across the wall: Add subsequent panels, checking your level regularly as you secure them to the timber battens.
How to Cut and Modify Acoustic Wall Panels
To cut acoustic wall panels to size, measure carefully and use a fine-tooth saw to cut horizontally across the timber slats. For vertical cuts between the slats, use a sharp utility knife to neatly slice through the felt backing.
- How to cut acoustic wall panels: Always cut with the decorative side facing upwards to prevent the wood veneer from splintering. Smooth any rough edges gently with sandpaper.
- How to fit acoustic wall panels around sockets: Measure the exact position of the plug socket on your wall and transfer these measurements to the back of the panel. Drill a pilot hole in the marked area, then carefully cut out the rectangular shape with a jigsaw. Always isolate the power supply before working near electrical outlets.
Frequently Asked Questions (FAQs)
Maintaining and understanding your acoustic panelling ensures it looks and performs its best for years to come. Here are answers to some of the most common questions about installation and maintenance.
How to clean acoustic wall panels?
The best way to clean acoustic wall panels is to use a soft-bristled brush attachment on your vacuum cleaner to gently remove dust from the slats and felt. For minor marks on the wood veneer, wipe lightly with a damp, lint-free cloth. Avoid harsh chemical cleaners as they can damage the finish.
How do you install acoustic wall panels on uneven walls?
If your walls are notably uneven, the batten method is highly recommended. Using timber battens lets you level the surface before attaching the panels, ensuring a perfectly straight finish that adhesive alone cannot achieve.
Can you fit acoustic panels in a bathroom?
Standard acoustic panels are not designed for areas with high moisture or direct water contact. If you need sound insulation in a humid environment, look for panels specifically designed for moisture resistance.
Acoustic Wall Panels at Beatson’s
Installing acoustic wall panels is an excellent way to enhance your room’s acoustics and visual appeal. By gathering the right tools, planning your layout, and following our simple installation steps, you can confidently complete this job to a highly professional standard.
With careful measurement and a bit of patience, tackling this home improvement task is highly rewarding. Ready to get started? Browse our full range of building supplies and discover the perfect Tuda acoustic panels at Beatson’s today. If you need any advice on tools or materials, our friendly team is always happy to help.
Read Next
The Ultimate Guide to Internal Doors
Spring Garden Maintenance: The Complete Outdoor Cleaning & Repair Guide
Comments are closed here.